Trilemmic Paradigms as Applied to Forced Induction
The popular project management aphorism “Quick, Cheap, Good: Pick two,” conceptualized as the project management triangle describes three desirable characteristics, only two of which can be true simultaneously. The requirement to exclude one of the favourable characteristics at all times necessitates a difficult decision.
In computing the concept is often expressed as “fast, cheap, good: choose two”.

In automotive engineering it takes the form of the following trilemma.
Preface
After the installation of a bellmouth downpipe & COBB Stage 2 tune on my summer time toy (a 2007 Legacy Spec.B) application and release of the accelerator pedal would cause the engine to stumble and the tachometer to drop to almost zero RPM. The accessport showed AF correction pegged at 25%.
Cheap and Good
Or Smoke testing and chasing boost / vacuum leaks
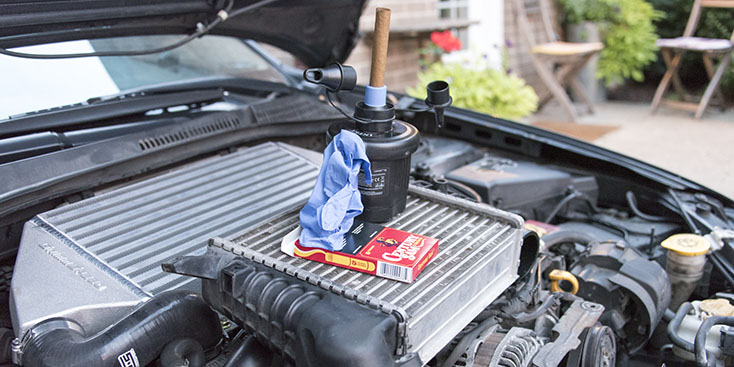
The most likely cause of the above scenario is a boost leak. There are a number of ways to test for intake manifold boost or vacuum leaks. Each with their respective advantages. One such method is the administration of propane or other flammable gasses to a running engine. Other solutions include fabrication of convoluted and flimsy smoke machines.
The following method is slightly more elegant in its simplicity and its significantly lower risk of setting things on fire. The below listed house hold items can be fashioned into an effective homebrew smoke machine.
- Electric air mattress pump
- Latex gloves
- Elastics
- Inexpensive cigar
Side effects may include emphysema.

Apparently this massive boost leak had no effect on the very reserved factory tune. Looks like it’s time for a new intercooler.
Cheap and Fast
Or how to support UPS.
I had opted against an OEM unit as they seem to require the addition of metal zip ties to keep everything stapled together and prevent it from bursting at the seams.
The CNT unit was also cheaper.
In doing some research I even found a thread or two and a youtube video that reported success. I’ve also had a decent experience with the installation of their downpipe. How bad could it be?
The unit shipped out fast, like next day morning fast. The website only offered one day or two day UPS shipping but after checking with the carrier website I noticed the shipping method was standard/ground. The representative quickly replied when summoned on facebook messenger and promised a refund “if mistake”. I promptly received a refund for the difference in shipping costs.
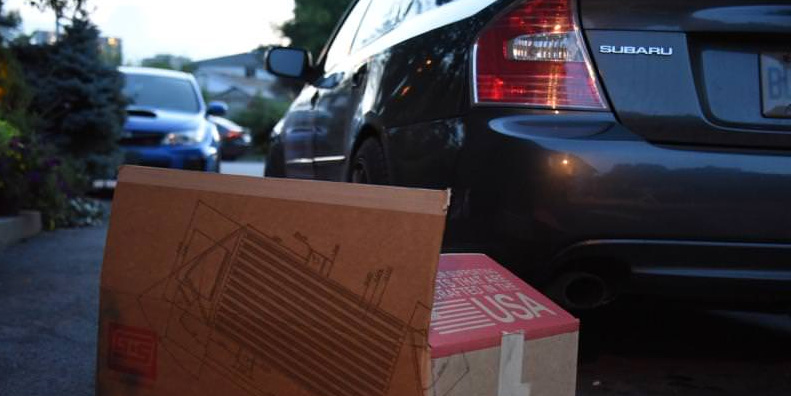
After a week of edge of my seat excitement DOS’ing the UPS website through my repeated abuse of the f5 key (and the excitement of driving my ford ranger) the package finally arrived.
The packaging was fair enough, the unit came out with one or two slightly bent fins. Maybe it happened during shipping. The welds look good as far as I know, but I don’t know any god damn thing about welding.
Before taking the plunge on the install I found the instructions affixed to the exterior of the box. They’re logical enough even if they consist of one single sided 8×11 page of engrish. It’s no huge crime, though if I were running a company, or a mailroom I’d probably have sent out for proof reading.
The stock intercooler is super easy to remove and needs to come out to essentially do anything under the hood. It should take 3.5 minutes and the unit will gladly jump out at you and cheerfully sit itself on the driveway out of the way while you continue working.
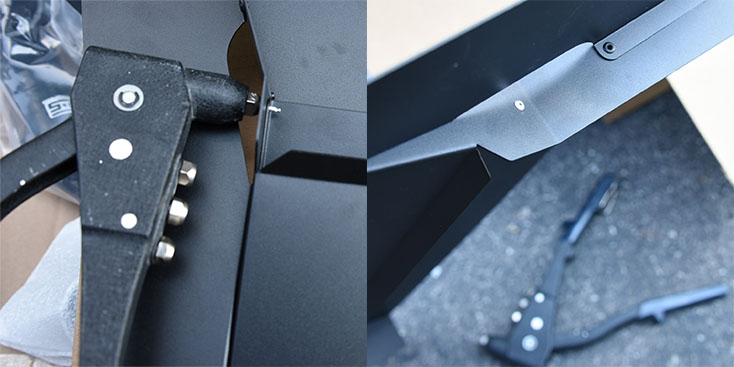
They recommend reusing the turbo inlet gasket which had to be forced into the groove of the new intercooler. The groove seems to be partially too narrow to accommodate the full width of the re purposed gasket. While seating the gasket a small piece had carved off. That wont make any difference anyways.
The new kit also came with some hardware. The 10mm bypass valve bolts? Well they’re allen key bolts now. That’s… sort of odd. Why would you use an allen key in this application? I reused the Subaru hardware for sake of consistency.
Remember the easy access to the clutch master cylinder? probably not, it just faithfully sat back there quietly doing its thing. Well, because CNT fitment the intercooler pushes up against it. If you need to get in there in the future you now have to remove the this monstrosity. But really, how often do you need to anyways? Yeah, just bend that out of the way. This thing isn’t just fighting for space, this is krav maga inflicted with the swiftness of a sumo wrestling honey badger clad in iron armor.
While you eviscerate the clutch reservoir the intercooler barely barely aligns with the turbo inlet. But not really. Just keep pushing the intercooler against that master cylinder until the threads are aligned as much as possible. Are they cross threaded yet? ok, good. After spending some time to attempt to fit a socket I realized the front bolt doesnt really actually give enough clearance for a socket. Maybe you could kill yourself and use a open ended wrench to turn the bolt 1/256th of a turn at a time. Maybe not. The old subaru bolts are too short. Remember that incredibly novel use of allen key bolts on the bypass valve? This could have been an actually useful application. If it wasnt cross threaded before it probably is now. Remove everything and wipe the shavings off the the turbo flange. Did I mention the new bolts come with washers? Yeah, those are going in someone’s turbo inlet. It makes me wonder if they test fitted this at all during the acceptance process.
Now I’m no mechanical engineer or certified automotive mechanic to be making these complaints, but to my knowleg there’s no amoeba chewing at my frontal cortex. Just a CNT atrocity munching at the engine bay of my spec.b and tearing at my soul.
I would attempt to apologize to the subaru engineering team for this install but I fear it may result in a mass seppuku situation. Which speaks volumes after builds with glass pistons, cracked oil pickups, cardboard headgaskets, ringlands made out of paper clips and intercoolers that essentially fly apart at the sight of boost. This thing is essentially a Perrin clone, had it been sent through the xerox machine 1000 times at 12 dpi.
I guess you don’t get what you don’t pay for. The installation that should have taken 4.5 minutes is now taking me to the hardware store to source some bolts that actually clear the intercooler. I’ll also be driving around town with a 1000 yard stare until a temple finds me in which I can seek atonement from the gods of thermodynamics for transgressions against mechanical engineering.
CNT did authorize a return without any hassle.
Fast and Good
Or you get what you pay for. Almost.
Having posted my CNT experience the community offered some suggestions. The Grimmspeed unit for my car was highly recommended. Reviews praised this vendor and I even found an article detailing my exact predicament. Evidently mine is not a unique experience.
The package was very well put together. The kit included QR codes to link both illustrated detailed PDF instructions as well as a video walk through. For the amount of Venezuelan dollars spent on the kit I do wish they had included a printed hardcopy of the PDF.
The kit comes with a splitter which mates the new intercooler to the hood. Everything looked pretty slick. Almost. This is a company that provides premium parts, boasts made in America & even has an inspection card that is personally initialed to assure order quality.
The splitter was missing a rivet. Damn it Cody you’ve screwed me.
Understandably disappointed & frustrated I now had to go on an expedition in the safari that is my basement crawlspace and hunt for the riveting tool. That should be no problem, it was last used and spotted ~6 years ago.
I don’t recall seeing this step in the installation instructions.
Removing the hood insulation can be a little tricky given it has the consistency of burnt cotton candy. But it’s fairly straight forward using a cats claw tool. I wouldn’t want to bother attempting it using a screwdriver.
The instructions seem to skip over what to do with windshield washer lines that run between the hood & splitter.
The hoses/couplers can be a bit of a struggle to get on. An extra long flat head helps immensely to sneak between the intake manifold in order to tighten the throttle body coupler. All new hardware and hose clamps were included with the exception of the turbo outlet bolts. Those are reused. Installation and removal certainly won’t be as effortless or quick as the OEM unit. But I really appreciate the fitment. The mounts are especially nice. The intercooler is suspended by two rubber vibration isolators used between the mounts. It sort of floats above the engine bay and can be nudged by touch.
The installation process took a couple hours on a sunny day. No more boost leaks and 16PSI of stage 2 boost power to enjoy.